AR Roll-a-ball Tutorial
Augmented reality game with WebXR on Meta Quest 3.
Documentations
- Courses : https://webxr.ldavid.fr
- WebXR : https://developer.mozilla.org/fr/docs/Web/API/WebXR_Device_API
- Aframe : https://aframe.io/docs/1.7.0/introduction/
- Three.js :
- Docs: https://threejs.org/docs/
- Manual: https://threejs.org/manual/
- Javascript Cheatsheet :
Objectives
- Discover and use WebXR through Aframe
- Use diverse documentations
- Build your first WebXR app
- Use Augmented Reality Fiducial Marker Tracking
Pre-requisites
- Basic programming skills
- Ideally some knowledge in javascript
- Knowledge of 3D concepts (vectors, matrices, etc.)
Material
- Meta Quest 3 (not tested on 2, Pro and 3s)
- A printed Hiro marker (or you can use another screen like your phone, but it will probably be less stable, because of screen reflections, refresh rate, etc...)
- A ruler (to measure the size of the marker)
Contact
- Arnaud PROUZEAU - arnaud.prouzeau@inria.fr
- Ludovic DAVID - ludovic.david@inria.fr
Step 1 - Online editor
To avoid having to install anything during the project, we will use an online code editor (krabbel.dev) that allows hosting static websites without even having to sign up!
Open https://krabbel.dev/p/jolly-brooms-worry project.
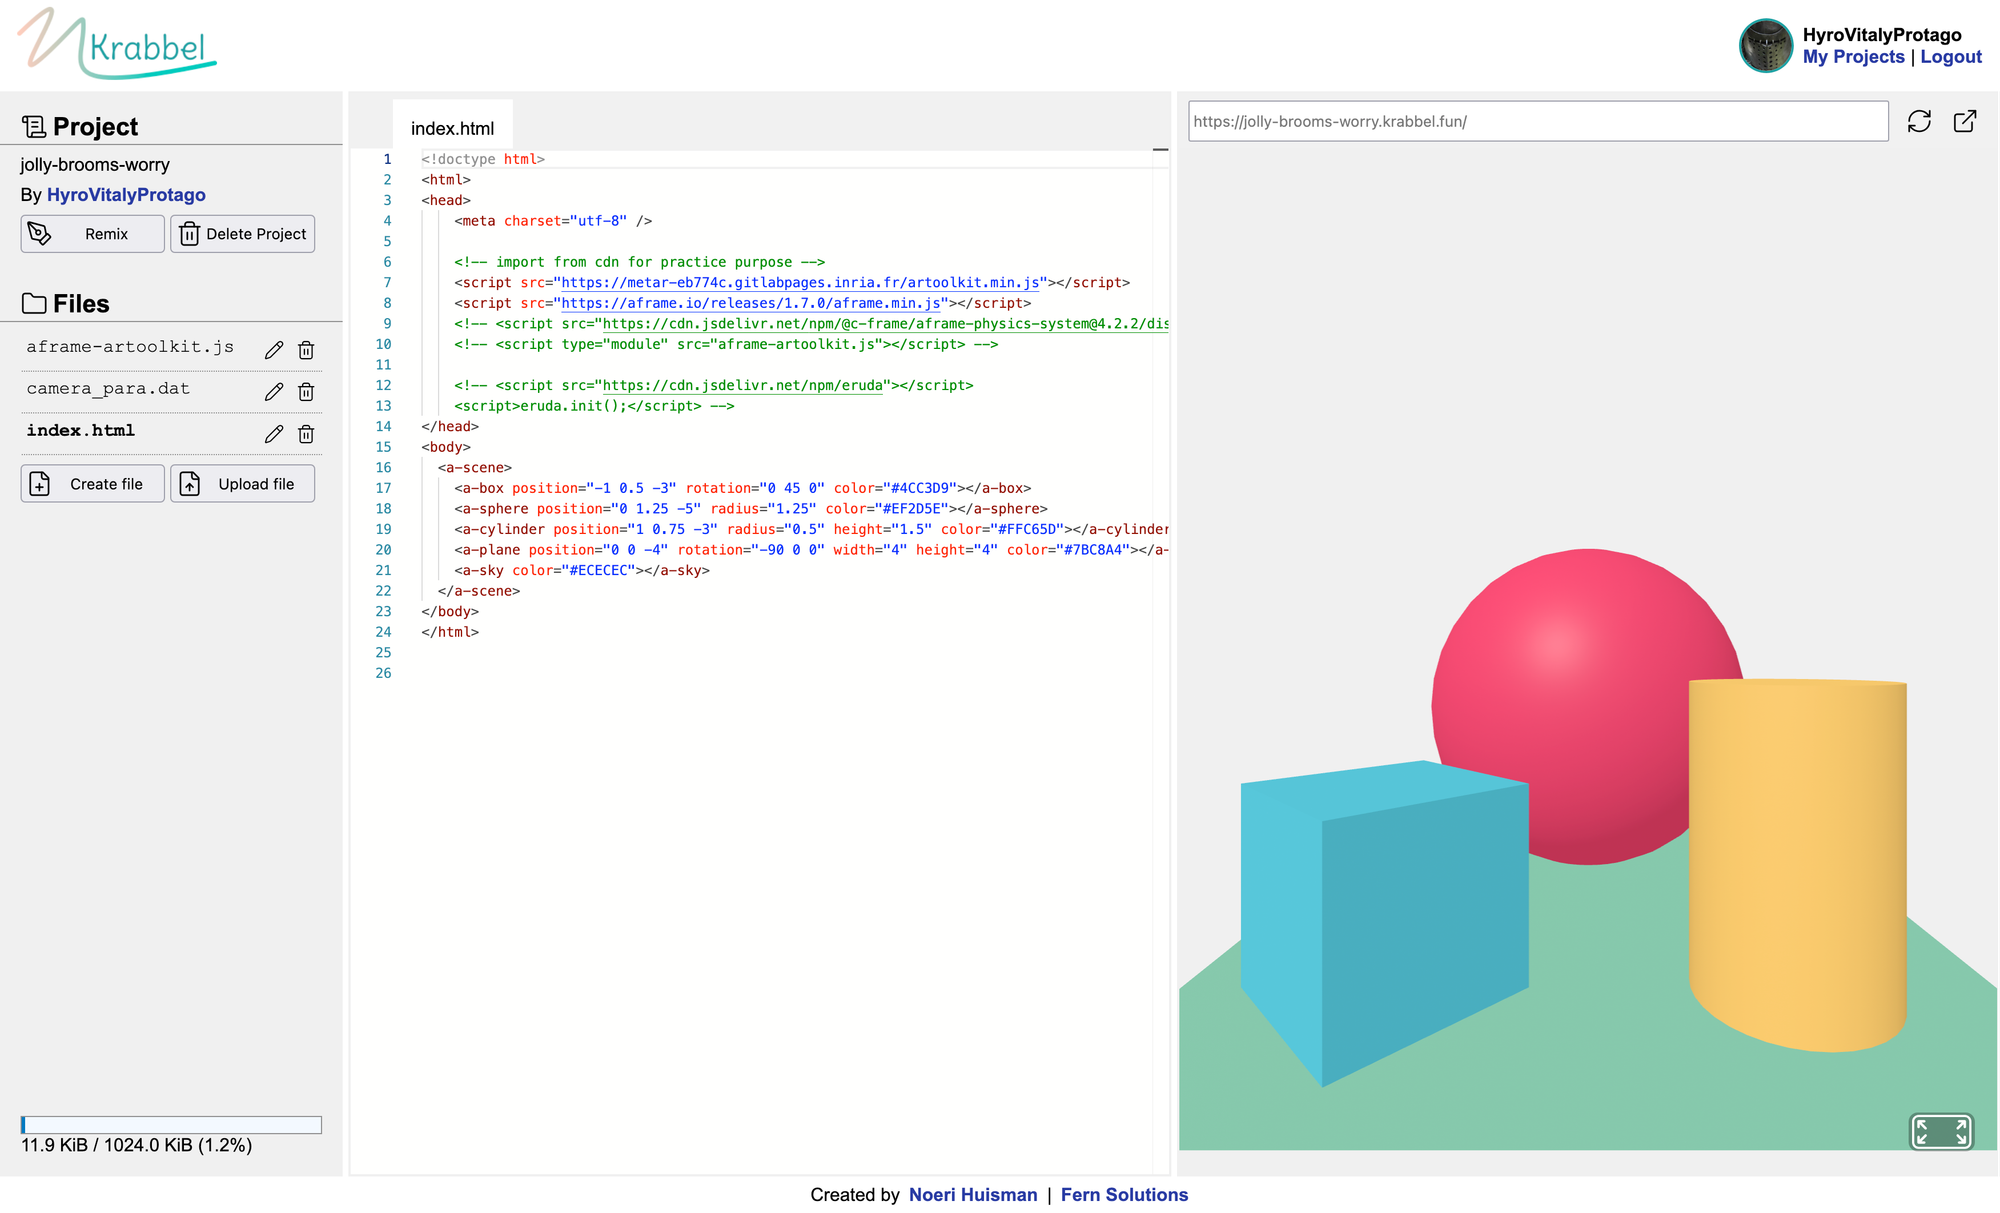
Then click on Remix button to be able to make changes.
You can then remove everything under <a-scene> as we will build the game.
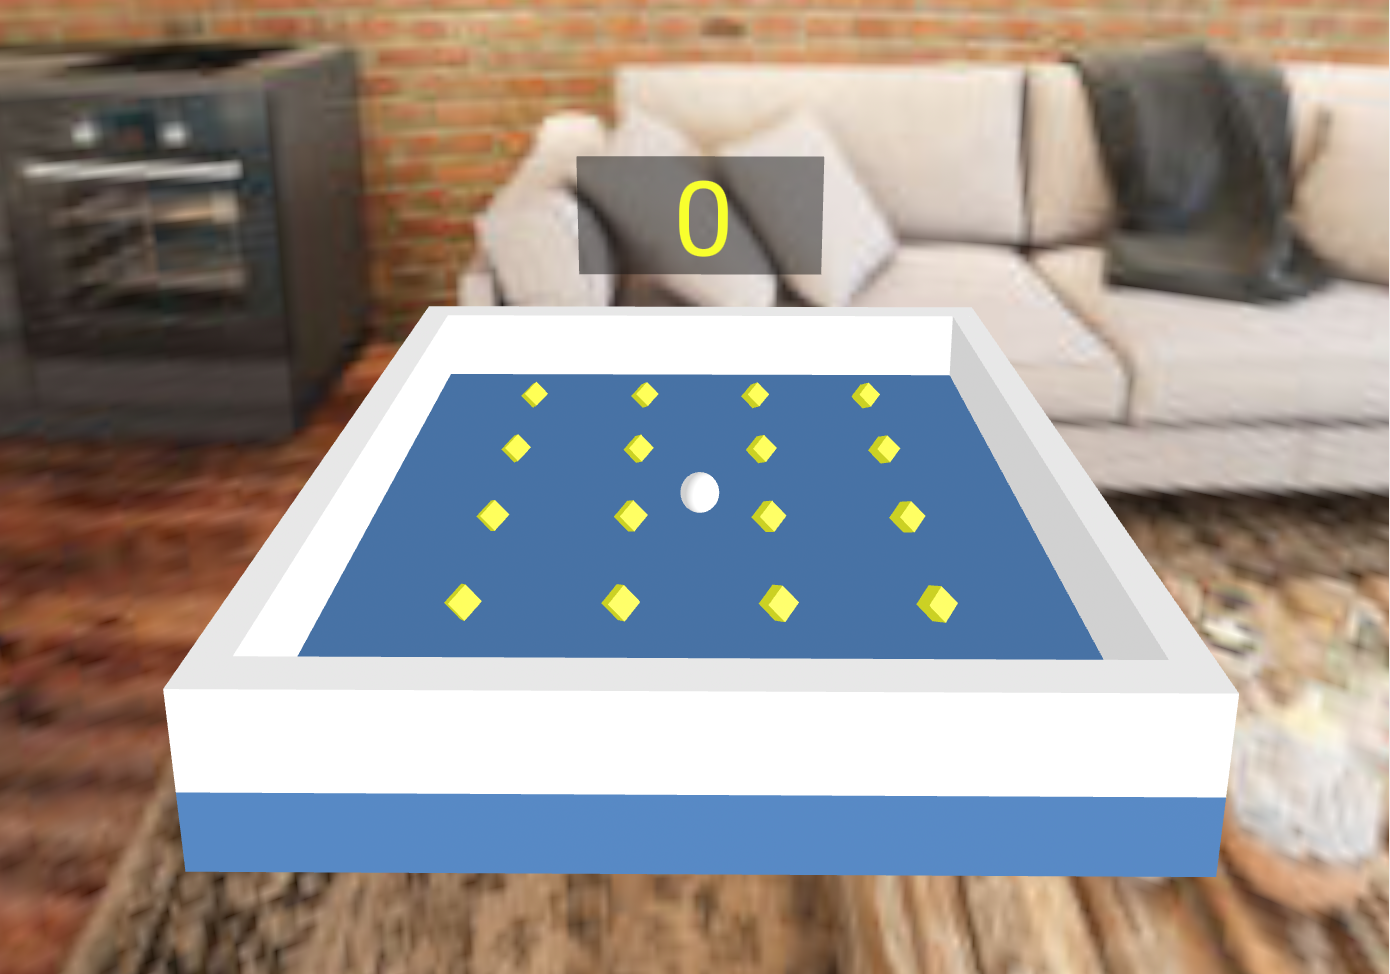
Step 2 - Roll-a-ball
2.1. Add arena
Create the arena which can be composed of 5 <a-box>, one for the ground and 4 for the walls.
2.2. Add the ball
Create a sphere that will represent the ball.
2.3. Add collectibles
Add cubes that will act as collectibles.
<a-mixin> system that is a similar concept of prefabs in Unity to avoid too much copy-pasting.Make them rotating on the y axis on themself with an aframe component. Add a speed parameter to be able to control rotation speed.
AFRAME.registerComponent("spin", {
    schema: { /* ... */ },
    init() { /* ... */ },
    tick(t, dt) { /* ... */ }
});2.4. Add physics
By default, aframe core does not come with physics, so you need to add a dependency inside the <head> as a <script>.
<script src="https://cdn.jsdelivr.net/npm/@c-frame/aframe-physics-system@4.2.2/dist/aframe-physics-system.min.js"></script>
Add the physics component to your scene. Then add the static-body component to the arena and collectibles. Add the dynamic-body component to the ball. You can adjust parameters like mass, linearDamping and angularDamping.
2.5. Add controls
Create a new component that applyForce on the ball body with the arrow keys. Add a force parameter to be able to fine tune the value easily.
dynamic-body take over the position, you should remove the component, then change the position, then add it back again 🙃2.6. Add collect behaviour
To be able to collect the cubes, you will need to create a new component that hide collectibles on collision. It could also be great to keep a score.
collisionResponse...2.7. Display the score
Use <a-text> to display the score in the scene.
Step 3 - Make it AR
3.1. Add AR
By default, aframe core does not come with marker tracking. As AR.js, we will use jsartoolkit5. You will need to add new scripts into your <head>.
<script src="https://cdn.jsdelivr.net/npm/artoolkit/jsartoolkit5@0.0.4/build/artoolkit.min.js"></script>

<!-- The following script use aframe and jsartoolkit5, so it should be added after it -->
<script type="module" src="aframe-artoolkit.js"></script>
Add also the default button to enter the WebXR scene in AR by adding the following component to your scene: xr-mode-ui="enabled:true; XRMode: ar;"
3.2. Add your level on the marker
Now, you have access to a new primitive <a-marker>. You can put anything relevant as children to the primitive to make it move with it, e.g.
<a-marker size=".08">
  <a-box position="0 .025 0" width=".2" height=".05" depth=".2"></a-box>
</a-marker>
You can see that marker have a parameter size that should correspond to the size in meter of your marker.
<a-entity scale=".1 .1 .1"> is tempting, but sadly, only the visuals are scale down, not the colliders...3.3. Open in headset
- ensure camera access is enabled in Meta Quest settings
- ensure hand tracking is enabled in Meta Quest settings
- ensure
webxr experimentsis enabled underchrome://flags/in the browser - you can go on shxr.vercel.app, enter a room name, then copy-paste the url of the preview, go on the site in your headset in the same room and access it in your headset. Or write directly the full url inside the headset.
- Authorize immersive session, launch the app by clicking the AR button, you will return to the browser view to authorize camera access. Then reload the page and enter the app
<head>.3.4. Make the AR better
- Handle
markerFound,markerLostevents to change parenting of the marker to keep the last known pose in world. - Handle smoothing of marker position/rotation/scale through lerp
- Use Hand-Tracking to reset the level and (re)spawn the ball
Step 4: Bonus
You can add other functionalities!
Examples :
- Generate random arena, like a maze, or with holes...
- Add cubes to avoid
- Be creative! 🐉